July 1st Update: Salesforce has put enforcement on hold! Salesforce is supposed to communicate a new timeline in the future.
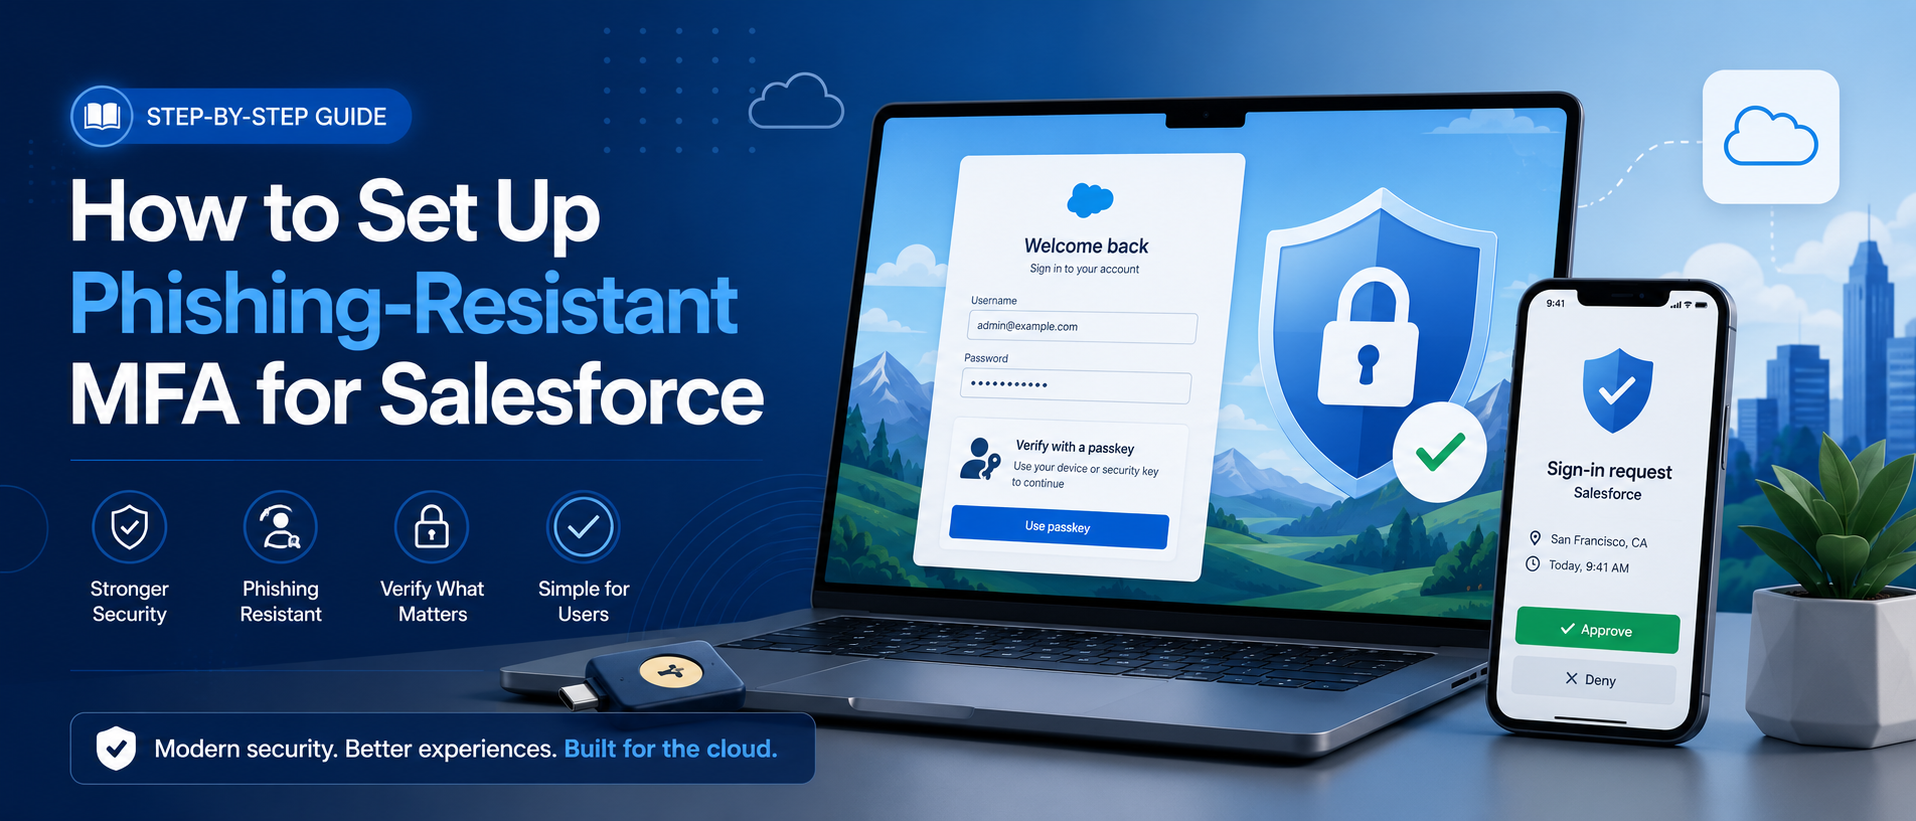
Starting July 1st, and staggered throughout July, Salesforce will enforce phishing-resistant MFA for admins and MFA for all users. MFA for all users has been widely covered since Salesforce began recommending it, so we’re going to focus on the new phishing-resistant requirement. But if some of your users don’t have MFA enabled, you also want to make sure that’s set up.
If you’re not prepared, you may get locked out of your Salesforce org and require Salesforce or another admin to assist you with logging in.
Who’s Affected
All admins, which include:
- Users assigned with the System Administrator profile,
- Users assigned with any one of these privileged permissions:
- Modify All Data
- View All Data
- Customize Application
- Author Apex
Salesforce has put together four questions that help you identify which configuration changes apply to your configuration. Salesforce MFA Requirement Check.
If you end up on Question 2 or 3 with the answer No, we recommend running this anonymous Apex script, kindly shared on Reddit, to identify which users need to configure their MFA.
If you’re using SSO, we recommend checking with your SSO provider first to see whether they meet the requirements. If not, you will need a separate, strong verification method for any users with elevated permissions (see the script in the previous paragraph to identify them).
What is Phishing-Resistant MFA
Phishing-resistant MFA is designed to prevent a bad actor from getting your MFA token. It excludes anything where a code could be shared with a fake website or someone who’s convinced you to share it.
Phishing-Resistant Options:
- Security Keys (WebAuthn)
- Built-in Authenticators (Touch ID, Windows Hello)
- Admin-Generated Temporary Verification Codes (Only for locked-out users who haven’t set up phishing-resistant MFA yet, or to help users add a new device).
How to Set it Up
First: Enable Security Keys and/or Built-In Authenticators.
First, at the Salesforce org level, an admin needs to enable the new types of identity verification options.
From Identity Verification in Setup, enable one or both of these options:
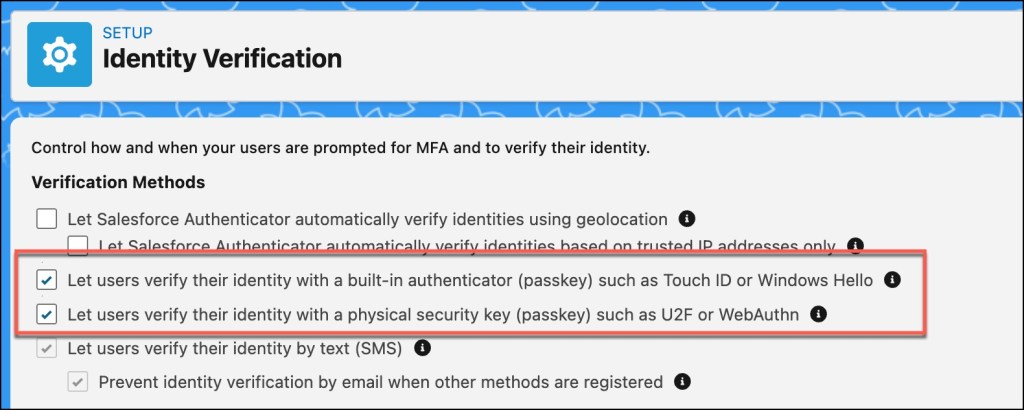
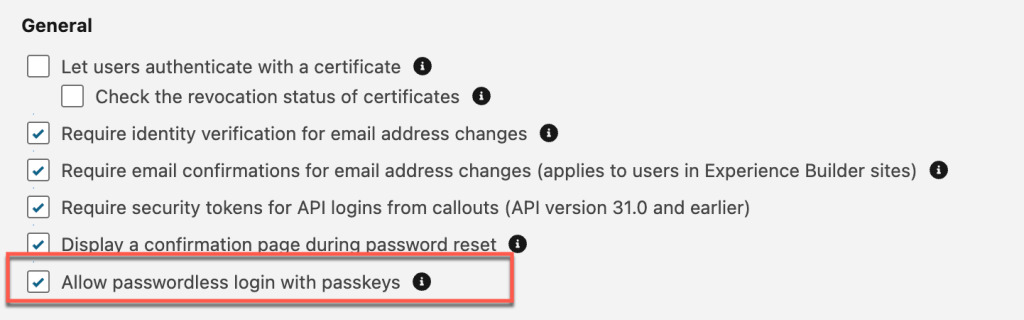
Salesforce also recommends enabling this setting to make logins a little less annoying:
Second: Configure a Passkey or Built-in Authenticator for a User
If you want to use passkeys:
- Click on your user picture in the top right (or Codey if you don’t have a picture)
- Click on Settings
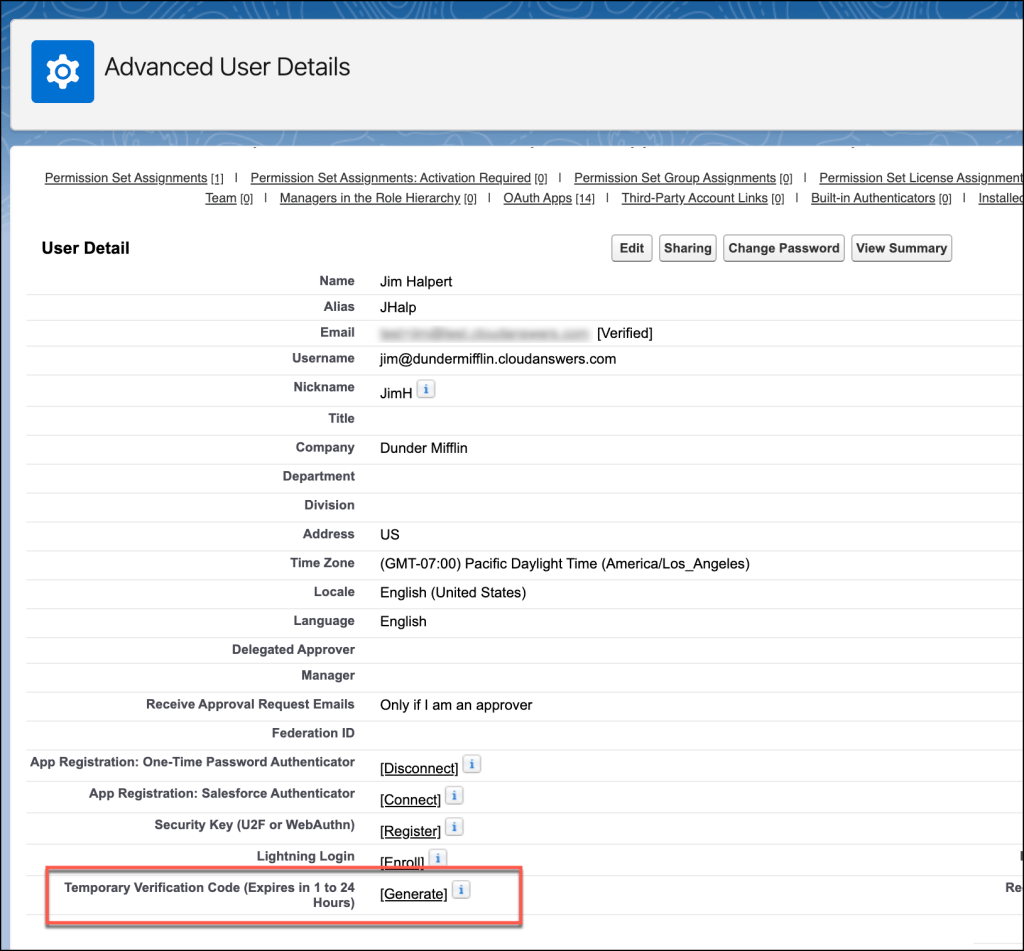
- Click Advanced User Details on the left panel
- Look for the Security Key (U2F or WebAuthn) field
- Click Connect
- Complete the MFA verification with your current MFA setup.
- Click Register Passkey
- Complete Passkey setup with your Passkey of choice.
Here’s an example using 1Password Passkeys:
If you want to use built-in authenticators:
- Click on your user picture in the top right (or Codey if you don’t have a picture)
- Click on Settings
- Click Advanced User Details on the left panel
- Scroll down to the Built-in Authenticators list and click Add
- Complete your verification using your current MFA method
- Click Register Passkey
- Use your built-in authenticator to complete the setup
Here’s an example using Touch ID:
If a user plans to add multiple built-in authenticators (which is recommended in case a device is broken), we recommend renaming them so it’s easy to see which one they’re trying to log in with. You can rename them from the built-in authenticators list for the user.
After setting this all up, we recommend logging out and logging back in to make sure it’s working. If there are multiple admins in your org, we recommend coordinating with another admin in case you run into a problem; they can send you a temporary passcode.
Backup: Admin-generated Passcodes
If a user with elevated permissions gets locked out, another admin can generate a passcode for them. Those passcodes can be generated from the user record.
Good luck! If you need help, feel free to contact us.