We had a client request to let users inline edit multiple records from list views and related lists in Salesforce. A few requirements we had:
- Display more than 15 columns in list views or 10 columns in related list views
- Display links to related records under a column
- Mass update a field for multiple records
- Mass update multiple fields for multiple records
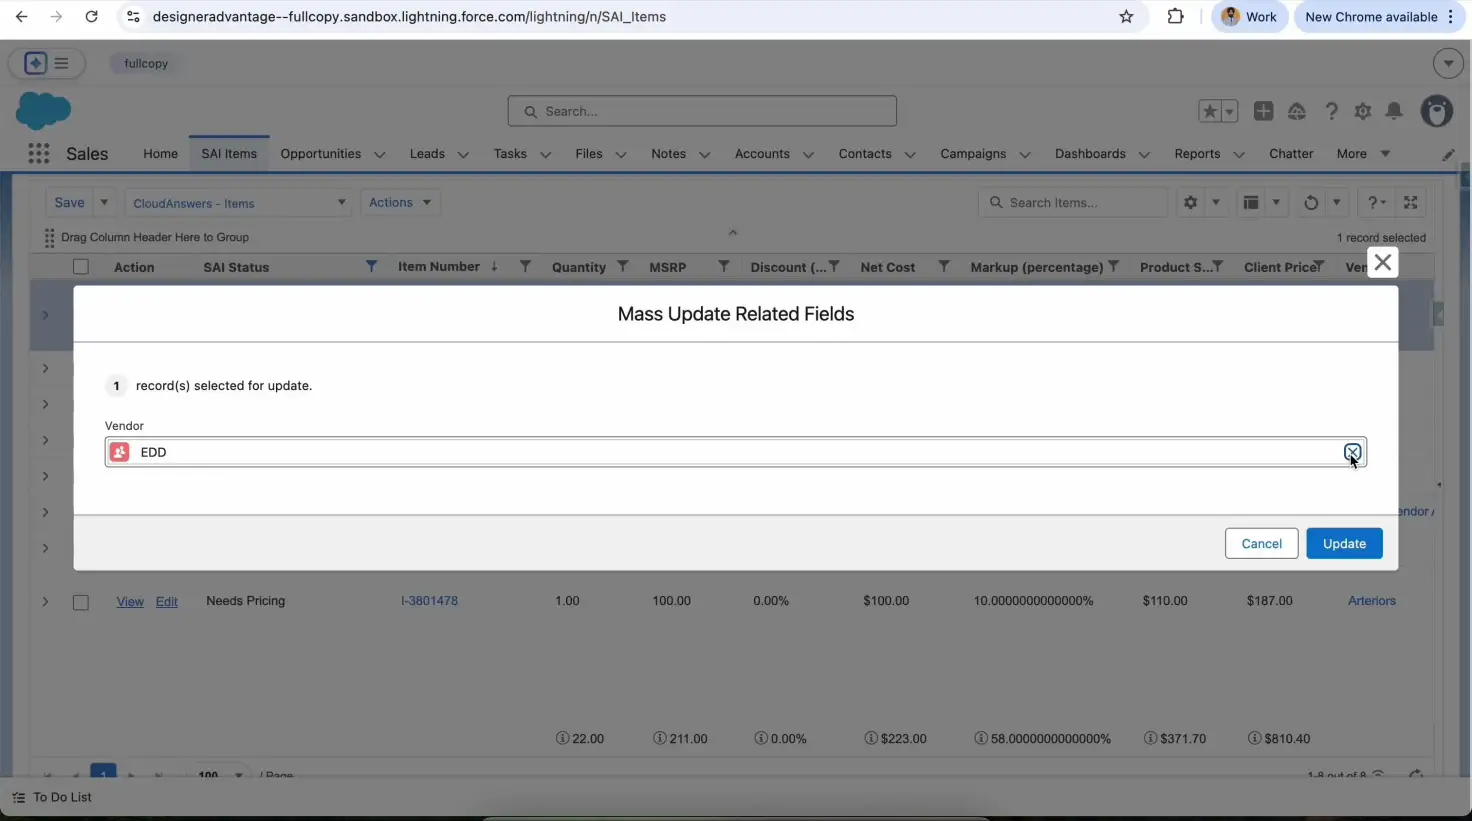
After exploring multiple tools, we narrowed down to Conga Grid, which met all the requirements out of the box except one. Conga Grid doesn’t allow mass updating of relationship fields that have lookup filters. But it has a nice feature, called Custom Actions, which allows you to add user-defined buttons or actions. In this article, we will learn about the solution we created to open Lightning Web Components from Conga Grid custom actions and mass update fields with lookup filters.
Here’s an example of what it looks like:
Add Conga Grid Custom Action via Static Resource
Conga Grid Custom Action follows the following structure. We use addCustomAction method from crmc global variable to add custom action. Couple of key things to note here are:
1. isAvailable function: It is called to decide when to display the custom action. We can add our custom logic here to control when the action shows up.
2. click function: It is called when you click the custom action. This is where all the magic happens. We use window.parent.postMessage function to send a message to parent window. We will handle this method in an Aura component to listen to message and pass it on to a Lightning Web Component.
crmc.require(['sfdc', 'KendoPopup'], function (sfdc, popup) {
    crmc.addCustomAction({
        // Unique identifier for this action item
        "itemID": "Open_Lightning_Modal",
        "isAvailable": function (context) {
            // Return true to display the item, false to hide it
            // check to ensure this is correct object and feature is enabled
            var isAccount = context.objectDescribe.name == "Account";
            var isEnabled = this.featureSecurity.getSetting(context.objectDescribe.name, this.itemID) !== false;
            // check to ensure at least one record is selected
            var multipleSelected = context.selectedRows && context.selectedRows.length > 0;
            return isAccount && isEnabled && multipleSelected;
        },
        "isHeaderAvailable": function(context) {
            // This function determines if this item can be displayed from the column header menu
            return false;
        },
        "isToolbarAvailable": function(context) {
            // This function determines if this item can be displayed in the Toolbar as a button
            return false;
        },
        "getLabel": function (context) {
            // This function returns the display label of the action item and is called before the item is shown
            return "Open Lightning Modal";
        },
        "createSubmenuItems": function (context) {
            // If this function returns additional action item objects, they will appear as submenu items
            return [];
        },
        "click": function (context, grid) {
            if (context.selectedRows.length > 0) {
                let rowIds = [];
                Object.each(context.selectedRows, function (selectedRow) {
                    rowIds.push(selectedRow["Id"]);
                });
                window.parent.postMessage(
                    {
                        action: 'OPEN_MODAL',
                        recordIds: rowIds,
                        message: 'Hello World'
                    },
                    '*'
                );
            } else {
                popup.popup('Please select records', 'Select at least one record to proceed.');
            }
        }
    });
});
Add a Modal using Lightning Web Component
We create a Lightning Web Component using the LightningModal element. This component has all the functionality which we want to perform on the selected records. We can custom code all the requirements in this component, but, for this example I’m just adding the boilerplate needed for end-to-end demo. Here are code snippets from modalExample.html, modalExample.js and modalExample.js-meta.xml files for modalExample Lightning Web Component.
<template>
    <lightning-modal-header label="Conga Grid Action"></lightning-modal-header>
    <lightning-modal-body>
        <p>{message}</p>
        <p>{recordIds}</p>
    </lightning-modal-body>
    <lightning-modal-footer>
        <lightning-button label="Close" onclick={handleClose}></lightning-button>
    </lightning-modal-footer>
</template>
import LightningModal from 'lightning/modal';
import { api } from 'lwc';
export default class ModalExample extends LightningModal {
@api recordIds;
@api message;
handleClose() {
this.close('closed');
}
}<?xml version="1.0" encoding="UTF-8"?>
<LightningComponentBundle xmlns="http://soap.sforce.com/2006/04/metadata">
<apiVersion>61.0</apiVersion>
<isExposed>false</isExposed>
</LightningComponentBundle>Add Lightning Web Component to open Lightning Modal
We create a Lightning Web Component, let us with name congaModalListerner, which will expose an @api method to open the Lightning Modal component which we created in the previous step. Here is how that component looks:
<!-- this component's template has no markup -->
<template></template>
import { LightningElement, api } from "lwc";
import ModalExample from "c/modalExample";
export default class CongaModalListener extends LightningElement {
@api
async openModalFromVF(data) {
const { message, recordIds, action } = data;
if (!message) {
console.error(
"CongaModalListener: No message sent for modal."
);
return;
}
let result;
if (action === "OPEN_MODAL") {
result = await ModalExample.open({
size: "large",
description: "Hello World Modal",
recordIds: recordIds,
message: message
});
}
if (result === "ok") {
// TODO: we can display result using toast event
} else {
// TODO: we can display result using toast event
}
}
}<?xml version="1.0" encoding="UTF-8"?>
<LightningComponentBundle xmlns="http://soap.sforce.com/2006/04/metadata">
<apiVersion>61.0</apiVersion>
<isExposed>false</isExposed>
</LightningComponentBundle>Add an Aura Component with Window Message Listener
We create an aura component, named CongaGridModalBridge, and add a “message” event listener to the window object. When a message event is received on the window, this component will find a reference to the congaGridListener component and call openModalFromVF api method from it. Here is what constitutes this component:
<!-- markup for CongaGridModalBridge.cmp -->
<aura:component implements="flexipage:availableForAllPageTypes" access="global">

    <!-- add the Lightning web component created in the previous step -->
    <c:congaModalListener aura:id="modalHandler"/>

    <aura:handler name="init" value="{!this}" action="{!c.doInit}"/>
</aura:component>
// JavaScript for CongaGridModalBridgeController.js
({
doInit: function (component, event, helper) {
window.addEventListener("message", function(event) {
// Optional: restrict by origin
// if (event.origin !== 'https://yourdomain.my.salesforce.com') return;
if (event.data && event.data.action === 'OPEN_MODAL') {
const modalHandler = component.find("modalHandler");
if (modalHandler) {
modalHandler.openModalFromVF(event.data);
}
}
}, false);
}
})Putting Everything Together
Now, we are ready to put all the pieces together. We create a Lightning Page, add the Visualforce page that has the CRMC_PP:Grid component to this Lightning Page and then add the CongaGridModalBridge to this page. Save the page and reload page, it should look something like below:

Conclusion
By using Lightning Components with Conga Grid we can bridge the gap between complex data presentation and a seamless user experience. This approach empowers developers to add custom business logic maintaining separation of concerns while using the powerful features available in Conga Grid. Whether you’re modernizing existing Visualforce implementations or building new Lightning-first applications, this pattern provides a flexible and scalable way to deliver enterprise-grade data grids in Salesforce.